You can make a professional YouTube thumbnail with AI in about twelve minutes. You do not need to hire a designer. You do not need any design skills at all. There are two simple ways to do this, and this guide walks you through both of them step by step.
Why AI Thumbnails Beat Hiring a Designer
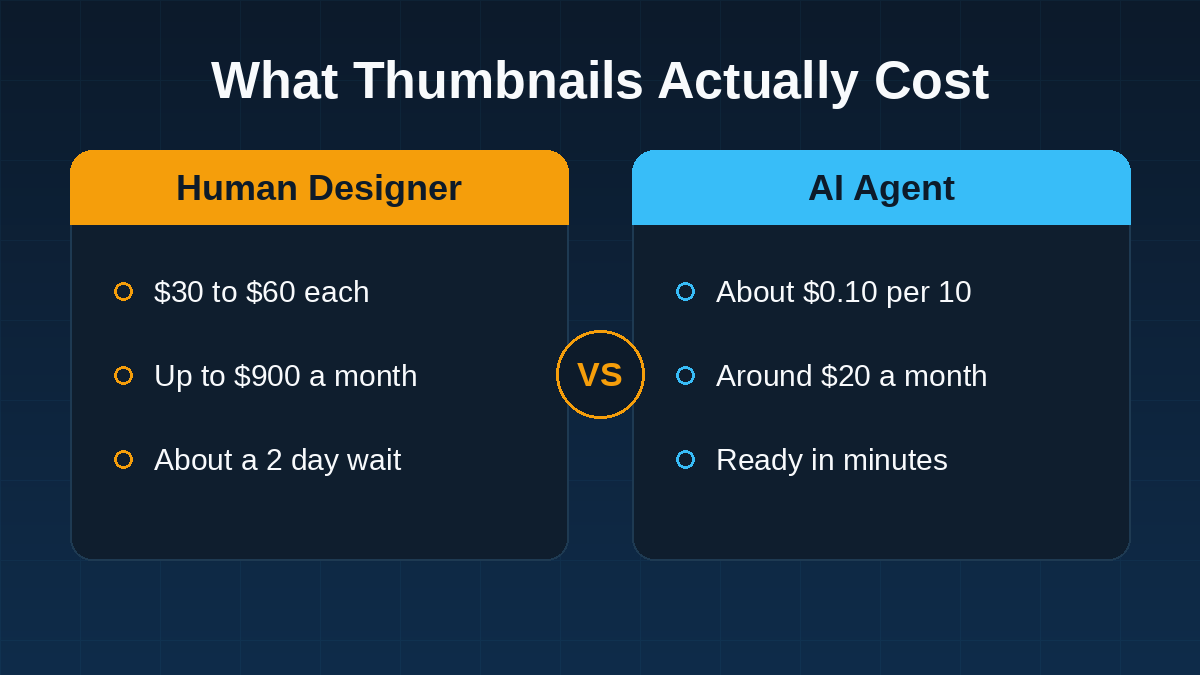
For a long time I paid someone to make my thumbnails for me. The price ran from thirty to sixty dollars for each one. If you order a thumbnail every single day, that adds up to more than nine hundred dollars a month. The turnaround was slow on top of the cost. I would upload my video, send it over, and wait around two days to get it back.
Then I went to an AI boot camp and started rebuilding my own workflow. I realized I could make my thumbnails with AI instead of paying per asset. The results were better than what I was getting from my designer. They popped harder, they cost almost nothing, and they were ready in minutes instead of days. That is the real reason this matters. You are buying back both your money and your time.
What You Need Before You Start
You only need three things to follow this guide. First, you need an AI tool that can generate images, such as ChatGPT, Gemini, or Perplexity. Second, you need a clear photo of yourself with decent lighting. Third, you need the title of the video you are making.
Method 1: The One-Prompt Method (Fastest)
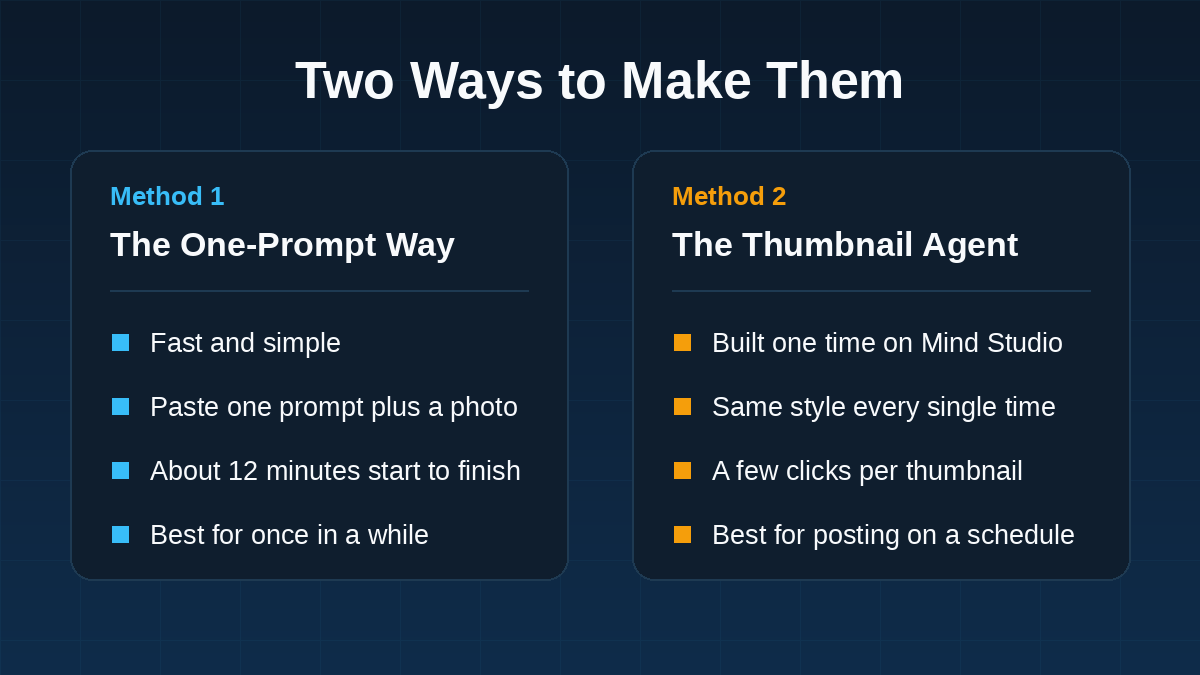
This first method is simple and quick. It is perfect when you need a thumbnail right now and you do not make them every day.
- Open your AI image tool and have it ready to go.
- Take a clean, well-lit photo of yourself to use in the image.
- Paste your thumbnail prompt and drop in your actual video title.
- Attach the photo of yourself so the tool can place you in the design.
- Set the final image size to a sixteen by nine ratio.
- Generate the thumbnail, then choose the variation you like best.
One honest note on this method. It is fast, but it is not perfectly repeatable. You will sometimes need to generate a few variations before you land the look you want. For the image itself I personally prefer GPT Image 2, because it gives me cleaner results than the other tools I have tested.
Method 2: Build a Thumbnail Agent (Repeatable)
The second method takes more effort up front, but it pays you back forever. Instead of writing a prompt every time, you build an agent once and it does the work for you after that. I like to use a no-code platform called Mind Studio for this.
Here is how the agent works once it is built. It asks you for your video title. It asks you to upload a photo of yourself. It also lets you give optional direction and an example thumbnail you want to match. Then it writes the prompt behind the scenes and generates the image for you automatically. It keeps your face consistent while it changes details like your clothing or the background.
The economics are hard to argue with here. The platform runs about twenty dollars a month at the time of this writing. The image generation adds roughly ten cents for every ten thumbnails you make. Building the agent took me somewhere between one and two hours. After that, every thumbnail is just a few clicks away.
One-Prompt Method vs Thumbnail Agent
Both methods work, so the right choice depends on how often you publish. Use the one-prompt method when you only need a thumbnail once in a while. Use the thumbnail agent when you publish on a schedule and you want the exact same style every time. The prompt method trades consistency for speed. The agent trades a little setup time for total consistency down the road.
Tips for Thumbnails That Actually Get Clicks
A few simple habits separate a good thumbnail from a great one. Keep your real face in the image, because faces with emotion earn more clicks. Use big readable text with only a few words. Always compare your new thumbnail against your old ones before you publish. The goal is to stop the scroll and earn the click.
Frequently Asked Questions
What is the best AI tool for YouTube thumbnails?
For the image itself, GPT Image 2 has given me the cleanest and most reliable results. Many creators write the prompt in one tool and generate the image in another.
How much does it cost to make AI thumbnails?
The prompt method can cost almost nothing beyond your normal AI subscription. A thumbnail agent runs about twenty dollars a month plus roughly ten cents per ten images.
Can AI keep my face in the thumbnail?
Yes, a well-built thumbnail agent keeps your face consistent while it changes other parts of the image. This is one of the biggest advantages of the agent approach.
Do I need design skills to do this?
No, you do not need any design experience to follow either method. The whole point is that the AI handles the design work for you.
How long does this take?
The one-prompt method takes about twelve minutes from start to finish. Building a reusable agent takes one to two hours one time, and almost no time after that.
The Bottom Line
You no longer have to pay a designer or wait two days for a thumbnail. You can write one prompt and have a thumbnail in minutes, or you can build an agent that does it on autopilot. Either path puts professional thumbnails within reach for any creator.
Watch the Full Walkthrough
The two methods above get you going, but building the agent is much easier to follow on video. Watch me build the thumbnail agent step by step, and see both methods in action from start to finish.
Key Takeaways
- The fast way is one prompt pasted into an AI image tool along with a photo of yourself.
- The repeatable way is a no-code thumbnail agent that produces your same style every single time.
- A human designer was costing anywhere from thirty to sixty dollars per thumbnail.
- The AI agent costs about ten cents for every ten thumbnails it creates.
- Most creators should start with the prompt method and graduate to the agent later.